
 Creating a beautiful live edgecharcuterie board is an art form. Sure, you can make your own, but it often takes a craftsman with an artistic eye to really make an impressive piece that will wow your visitors! With that in mind, we’ve done the leg work to bring you some of the best examples of these beautiful boards.
And in case you want to go the DIY route, we’ve provided step-by-step instructions to help you design and build your own personal serving tray for cheese and cracker boards, sliced meats, and more.
Please note that some of the links below may be affiliate links and if you make a purchase through them, we may earn a small commission as a result (at no extra cost to you).
Article Sections
Some of the Most Beautiful Live Edge Charcuterie Boards Currently on the Market
Fractal Burnt Live Edge Epoxy Charcuterie Board

Cost: $4,960
This particular board is made by using electricity to burn the wood – which burns random patterns into the grain of the wood – producing the incredible river effect show. After that, the burn is chipped out, before being filled with epoxy and being sanded.

Cost: $2850
This is another example of a fractal burnt board (which is made using 15,000 volts of electricity to burn a random pattern into the wood and produce this wild effect), which is finished using epoxy.
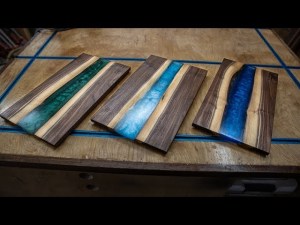
Gorgeous Live Edge Black Walnut Charcuterie Board

Cost: $220
A classically styled serving board, this elegant board has a timeless look that will compliment any interior design style.
Of course, to take your serving game to the next level, be sure to check out our article on the most personalized charcuterie board here, or our article on getting a custom charcuterie board here.
What is a Live Edge Charcuterie Board?
A live edge charcuterie board is an innovative & very contemporary way to serve delectable meats, cheeses, and snacks. This type of board features an organic look with a rustic flair due to its unique shape and design crafted from raw edges of organic wood 🌳 that was cut or sawed specifically to achieve the desired shape. 🧀
These boards are handmade using pieces of wood salvaged from forests or beaches. Once chosen, a craftsman shapes it into desired form before applying multiple layers of protective sealant to preserve it for years to come. The end result is an eye-catching display piece perfect for hors d’oeuvres, cheese plates, appetizers – you name it! 🎨

What Materials are Needed to Create a Live Edge Charcuterie or Serving Board?
1. Wood – (ex. like a live edge black walnut charcuterie board)
Live Edge Charcuterie Boards are a beautiful and functional way to entertain guests at home. When crafting these pieces, the type of wood chosen is important for determining the overall aesthetic, functionality, and durability of the board. Different types of wood offer unique advantages when making a live edge charcuterie board, with some standing out above the rest.
Getting a maple cutting board can be an excellent choice for a live edge charcuterie board as it is strong and resistant to cracking when exposed to moisture or extreme temperatures. Maple also offers a smooth finish that easily takes stains or paints, allowing you to customize your board’s look in whatever way you want. Another great option is walnut as its dark tones gives any piece a rich appearance while providing greater stability than many other woods. Finally, cherry is an ideal choice for those wanting a lighter-colored board with a natural luster.
Some other popular wood you can use include Ambrosia Maple, Aromatic Cedar, Ash, Black Limba, Blonde Limba, Elm, and Olive. Padauk is another popular choice for creating a live-edge charcuterie board.
2. Resin – for molding and sealing
Resin is an important material in crafting live edge charcuterie boards. Resin often adds a unique look and protection to any live edge board. It adds character, style and a beautiful finish that is both durable and long-lasting.
For many, resin-infused live edge boards offer the perfect combination of aesthetics and practicality. The epoxy resin seals in the natural character of the wood while adding a glass-like finish for superior protection from light damage, water stains, hot or cold temperatures and everyday wear and tear. This helps keep the charcuterie board looking good for years to come while providing an elegant presentation that can’t be achieved with other materials.
3. Sandpaper – for smoothing and finishing
Sandpaper is an indispensable material when crafting live-edge charcuterie boards 🪵. Not only does it help you create a stunning and even finish, but also shields the board from bacteria or other contaminants that may have settled onto its surface. 🔪
Sandpaper is most-often used in the final stages of crafting a charcuterie board, helping to smooth out any sharp edges while buffing away any nicks or burrs. The paper itself contains tiny particles which act as an abrasive when rubbed against wood, creating an even surface that brings out its natural grain pattern and color. Furthermore, sanding down a board also removes any contaminants left behind during production such as dirt or sawdust. 📝

4. Knife – for cutting and shaping
Knives are versatile and provide crafters with an efficient way to cut and shape different kinds of wood into the desired shape for their charcuterie board. This type of cutting requires precision and accuracy, so having a sharp knife helps ensure consistent results every time. Knives come in various shapes and sizes, depending on the project at hand, allowing crafters to make unique designs for their boards. Additionally, knives provide crafters with added control when removing bark from logs or shaping curved edges for intricate detailing work.
5. Saw – for trimming and shaping the live edge serving tray
The saw 🪚 is an essential tool for crafting live edge charcuterie boards. This craft requires precise cutting along the natural contours of wood, creating a smooth and symmetrical board with rustic charm.
By using a saw to cut multiple pieces of wood at once, you can ensure all angles remain straight and even. Different types of saws exist to suit various projects; handheld jigsaws can be used for making curved cuts while band saws offer speedy precision when making straight cuts quickly and precisely.

6. Router – for shaping edges of live serving boards
The router 🛠️ is a motorized tool that can precisely shape, trim, and hollow out materials with remarkable consistency. This makes it ideal for creating stunning live edge charcuterie boards with ease. Utilizing your router to craft these beautiful works of art allows you to customize the size, shape, design elements like cutouts or grooves on the board that would not be possible using only manual labor alone. With access to this powerful tool, you have the freedom to create any number of unique designs not possible with traditional methods like hand carving or sanding alone.
7. Clamps – for holding pieces together of live edge cutting board
Crafting a live edge board requires the use of clamps to secure the wood while gluing sets and dries. Clamps come in various shapes and sizes, all with their own unique purposes when it comes to crafting a quality charcuterie board.
When two pieces of wood are joined together, clamps hold them together until the glue has completely set. The pressure created by the clamp ensures that both pieces stay flush against each other while drying so that no cracks or air pockets form between them. This is essential as any weak points may affect how well the final product holds up over time and how even its finish looks when finished.

8. Beeswax or oil – to protect and seal the live edge boards tray
Beeswax and oil are essential materials in crafting a beautiful, unique live-edge charcuterie board. These natural products add a special touch of shine and protection to the board that helps it last for years. Beeswax is extracted from beehives and used for many purposes such as making furniture wax, candles, skincare products, and more. It’s an ideal material to coat wooden surfaces with due to its natural waterproofing properties which help protect the wood from moisture. Oil also helps preserve the wood by providing a protective layer that prevents cracking or warping over time. The combination of beeswax and oil creates a stunning finish that brings out the natural beauty of any wood surface while protecting it against daily wear and tear. Not only does this make live edge charcuterie boards look great but it ensures they’ll last much longer than without these materials.
How to Craft a Live Edge Charcuterie Board: The Step-By-Step Procedure
This easy step-by-step guide will show you how to craft a beautiful live edge charcuterie board for your next gathering. This is a perfect way to serve up delicious snacks, cheeses, and other hors d’oeuvres in style. If you have the tools, enough working space and time, you can craft your own in just a few simple steps. You’ll have a live edge charcuterie board in no time!
Step 1: Select the type of wood to use for the board (e.g. walnut, cherry, acacia, black walnut, etc.).
When selecting wood for your live edge charcuterie board, it’s essential to take into account several elements. First and foremost, decide on a grain type that will look best on the board. Woods come with a range of grains, such as straight grain or curly grain; you have the freedom to choose which aesthetic appeals most to you. Second, consider the weight and stability of the wood you wish to use; some woods may be lightweight yet unstable, making them unsuitable for cutting boards due to their tendency to shift around while being cut. Finally, take into account the durability and upkeep requirements associated with your chosen wood; some require more oiling or conditioning than others, so be mindful of how much time and energy will need to go into keeping your charcuterie board looking its best.

Step 2: Cut and shape the board to your desired size and shape.
Cut and shape the board to the desired size and shape before cutting, to make it easier for users to handle while providing a smooth and even finish. Doing this also enhances its aesthetic appeal for food presentation. Finally, using a saw with multiple cutting angles makes shaping easier too. 😊
Step 3: Use a router to create decorative edges or patterns on the board.
Cut and shape the board to the desired size and shape before cutting, to make it easier for users to handle while providing a smooth and even finish. Doing this also enhances its aesthetic appeal for food presentation. Finally, using a saw with multiple cutting angles makes shaping easier too. 😁

Step 4: Use a drill to create holes for handles or for hanging it on a wall.
Using a drill to create holes for handles or to hang the board on a wall is a quick and easy way for one to cut out handles. This ensures that they can have perfect, classic handles on their charcuterie board while also allowing them to move and store it with ease.
Step 5: Sand the board to smooth any rough edges and to create a uniform look.
Sanding the board is e🤩ssential to achieve a uniform appearance. Sanding helps remove any imperfections, splinters or rough edges from the hardwood for an even surface for an attractive finish. High-grit sandpaper can be used on this wood to give it a glossy sheen that not only improves its visual appeal but also makes it easier to work with when crafting charcuterie boards.

Step 6: Apply a sealant or finish to the board to protect it from moisture and heat.
Applying a sealant or finish 🛡️ to the board is intended to protect it from moisture, dirt, and other pollutants while givin’ it an elegant appearance. In addition to this, this coating is food-safe – so you will be able to use this board to cut and prepare food without the worry of adding toxins to the food you’re making.
Step 7: Use epoxy or resin to make the board more durable and create a unique design.
Epoxy and resin boards 🪵 have been found to offer several advantages when crafting boards, such as being strong, waterproof 💦 and resistant 🛡️ to chemicals. Furthermore, epoxy and resin boards can also be made from woodworking or other construction scraps, making them a great choice for crafting charcuterie boards or other specialty boards.
Step 8: Apply a food-safe oil, such as mineral oil, to protect the board from moisture.
It is important to use a food-safe oil on the board in order to reduce environmental impact and addiction potential. Using a food-safe oil also helps protect the live edge charcuterie board from damage over time, as it prevents warping or discoloration of the wood. Additionally, it adds color and contrast to the board, making it visually more appealing.

Step 9: Remove excess oil from the board.
It is important to remove excess oil from the board before using it because this will prevent the surface of the board from becoming bumpy over time, which can be damaging. Additionally, without removing the excess oil, the board may not be able to withstand temperatures in an oven or dishwasher. Finally, regular application of Butcher Block Oil is necessary for keeping wooden boards looking beautiful and preventing them from cracking or warping.
Step 10: Allow the board to air dry before use.
It is important to allow the board to air dry before use in order to reduce moisture build-up and corrosion, which can eventually lead to damage to the live-edge charcuterie board. Allowing the board to air dry helps protect its natural colors and prevents cracking from occurring. This will help ensure its longevity when used for displaying cheeses and other food items.

Frequently Asked Questions
How thick should a live edge charcuterie board be?

When selecting the thickness of a live edge charcuterie board, one key factor to consider is how much weight it will support. If you plan on serving heavier items such as meats and cheeses on your board, thicker boards are recommended since they can better withstand additional weight without warping or cracking over time. Furthermore, thicker boards provide extra durability for everyday use, making them ideal for heavier duty applications.
Is there a difference between a cutting board and live charcuterie boards?

Cutting 🪚 boards and charcuterie 🍖 boards may look similar, but there are some key differences. Cutting boards are typically made of wood 🌳 or plastic and used mainly for food prep such as chopping, slicing and dicing. Charcuterie boards can also be used for food preparation, but their primary purpose is serving items like cheeses 🧀, meats 🥓 and other bite-size snacks 🍢. The size of these boards varies depending on their intended use; however, most are ideal for this purpose. Cutting boards come in a range of sizes from 8x10 inches to large 18x24 inch ones, while charcuterie boards typically measure 12x20 or larger and can hold multiple items simultaneously. Cutting boards usually feature sharp corners while charcuterie boards have round edges which add visual interest when displaying food items.
How long does it take to create your own a live edge charcuterie board?

The length of time needed to create a live edge charcuterie board depends on the size and style you choose. Smaller boards with simple designs can be completed in as little as two hours, while larger boards may require up to five hours or more. You will also need additional time if you plan to stain or paint the wood before assembling the project. It's important to factor in these details when estimating how long your project will take.
How far in advance can you put together a charcuterie board?

Answer: It depends on what food items you plan to include. Cheeses, cured meats, fresh fruits and jams can usually be prepared up to two days ahead of time; however, it's best not to assemble the board until about an hour before serving so all ingredients remain as fresh as possible. When adding crackers or other baked goods, make sure they're stored in airtight containers so they don't become soggy or stale. Nuts and olives may also be added for texture or flavor but should be measured out shortly before serving so their crunch remains intact. 😋
What should you not put on a charcuterie board?

The biggest mistake when creating a charcuterie board is overloading it with too many options. You want to choose the best quality items available, but don’t pack the board full of food that won’t be appreciated or enjoyed. Avoid putting processed meats such as hot dogs and bologna on the plate – instead, opt for fresh and cured deli meats like prosciutto or salami. Additionally, skip out on smelly cheeses like blue cheese that could overpower other flavors on the plate, opting for milder varieties such as cheddar or brie instead.


